A Look Into the Workshop
= Mandonator™ Serial #18 ===
This resonator mandola was commissioned by Dion M.
The options he chose are:
- 4 string mandola with 17" scale
- Khaya mahogany body with dark stain, bound with African ebony
- Boxed maple purfling
- Cutaway
- Round ebony-lined soundhole
- White Mother of Pearl inlays
- Banjo shaped headstock
- Volute
- Black Gotoh 510 Mini tuners
- Special moon and stars coverplate
- Cast James tailpiece
- Formby's satin tung-oil finish
Standard features include:
- Spherically arched back
- Nickel plated hardware
- Radiused fingerboard
- Spider bridge and resonator cone
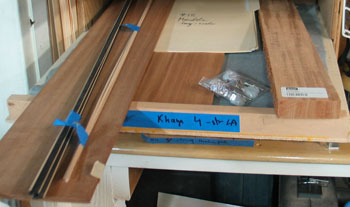
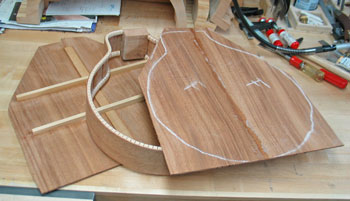
Here you see some of the parts for Mandonator™ 18 gathered together in its dedicated shelf drawer, most notably the wood for the body, sides, and neck.
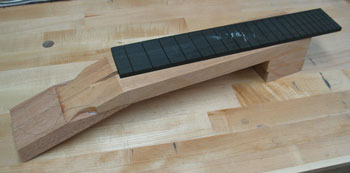
The neck blank is constructed by joining pieces of wood. This neck blank is larger than the standard Mandonator neck in order to accommodate the mandola scale. You can faintly see the penciled outline of the banjo shape headstock. The fingerboard is slotted before I attach it to the neck.
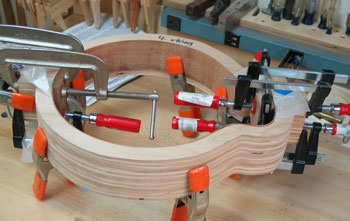
The sides are being joined with end blocks. The sides are held in a form and the end blocks are clamped in place at each end. Wax paper separates the outside of the instrument body and the form to prevent any glue seepage from joining them together. When the blocks have set, I'll add lining along the edges of the rim.
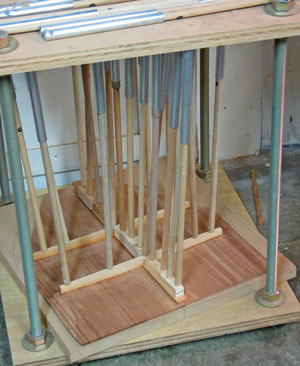
The braces are being installed on the back of the instrument using a go-bar deck, which clamps the braces to the back. The braces are arched to match the arch in the back and will help maintain the arch as well as strengthen the back.
The back, front and rim are ready except for some cleanup. I'll attach the front to the rim and cut the opening for the resonator before I attach the back.
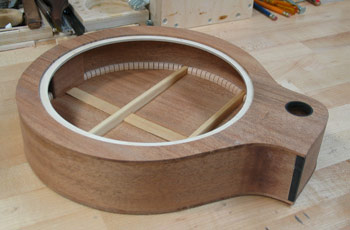
The top is attached to the sides as one piece, and roughly trimmed. The soundhole and opening for the resonator are then cut.
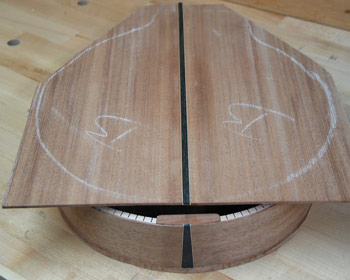
The back is ready to attach to the sides. The ebony inlay down the center of the back will meet the inlay wedge on the bottom of the instrument. It's hard to see in the photo, but the inlay is edged with maple purfling.
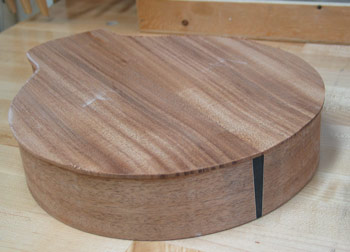
And here's the body after cutting the resonator opening and soundhole, attaching the back, and trimming top and back flush to the rim. It still needs to have binding installed.
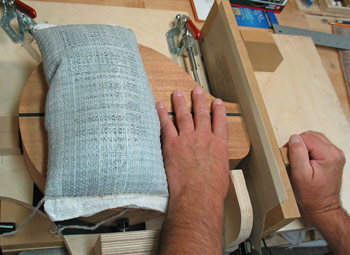
This jig holds the body securely in alignment while I sand the edge that will be attached to the neck. This ensures that the edge is perpendicular to the centerline of the body.
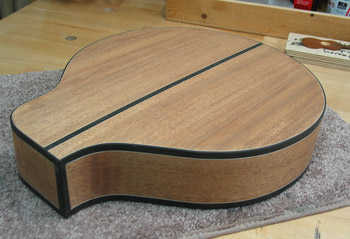
The ebony binding and purfling provide a lovely accent on the body.
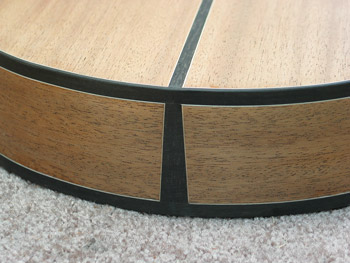
Here's a closer look at the tail, showing the ebony inlay and binding with box purfling.

Neck and fingerboard, ready to be glued together. You can see the graphite truss rod in the center of the neck. I'll finish shaping and cleaning them after they're joined.
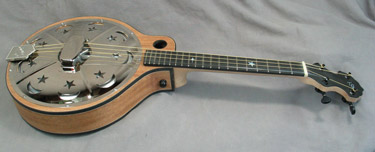
Mandonator™ is still "in the white" but is fully assembled for testing. I'll disassemble it again for some final clean up and application of stain and tung-oil.
Mandonator™ 18 has been completed! You can see photos of the finished instrument on its Gallery page.